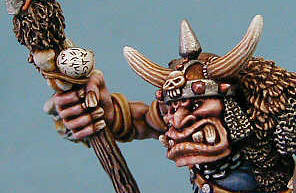
Photographing Miniatures

I do not claim to be a professional photographer. Taking good pictures of miniatures, however, does not require a master photographer. The purpose of this article is to describe a simple and cost effective technique for taking photos of figurines with a digital camera.
What You Need
- The problem with miniatures photography is that the figures are very small! Some cameras are not able to focus on objects that are very close to the camera. A tiny figure must be positioned close to the lense in order to get a detailed photo. You need to obtain a camera that has Macro capability. This will allow you to take very close pictures of the miniatures without image blur. Macro capability should enable your camera to produce clear, sharp photos of very tiny objects.
- You will need a flat surface for which you can create a 'studio'. A table or a couch is good enough for the job. The area does not need to be very large (just enough to place the figure, lights, backdrop, and wall upon).
- Proper lighting is very important for photography. White lights and natural lights are the best because they will accentuate color vibrancy. Some cameras have settings that can adjust to various types of light. Most of the photos that I've taken of miniatures were taken under flourescent lights with the camera settings adjusted to the same type. The best lighting can be achieved with two or three positionable lights. If you are going to use standard house lights then I would suggest at least 75 Watt bulbs.
- Backdrops make miniatures appear as the focal point on a photograph. You can use a white, blue, or green sheet of cloth for the backdrop.
- A wall that supports the backdrop reduces shadows and helps eliminate visual distances. If you are using a couch for the studio then you can use its back for a wall. Otherwise, you will need to build one. A pile of books stacked on top of on another is suffiecient for the task. The wall creates a slope for the backdrop to rest upon so that visual perspective is distorted.
Taking Pictures
Photography Session Tips
- Set up the camera (preferably on a tripod) in front of the miniature. A tripod can be purchased for as low as 20 US Dollars. Tripods steady the camera, enabling it to generate a sharper image.
- Set the camera to macro mode.
- Adjust the cameras lighting settings so that they match the type of lights that you are using.
- Set a good quality graphics resolution on the camera. If the photos are too large then they can be compressed later with an image editor software package. For internet photos, I usually compress the images to between 10 and 15 percent.
- Take multiple pictures and at different distances. Also twist the miniature around so that you can take pictures from different angles. This will help ensure that you get some images that are worth keeping.
- Purchase an AC Adapter for your camera. This will enable you to spend more time taking photographs without wasting batteries.
|
||