 In 1984, a neighbor introduced me to the game of Dungeons and Dragons and miniatures. The miniatures fascinated me more than the game. I went to a hobby store and bought a box of 'Fighters, Rangers, and Paladins' by TSR. I loved them even though they weren't very nice figures.
I had no idea how to paint, but managed to place the colors approximately where they belonged. To the left is the the first miniature that I ever painted. It serves as a wonderful reminder of how far I've come since then.
In 1984, a neighbor introduced me to the game of Dungeons and Dragons and miniatures. The miniatures fascinated me more than the game. I went to a hobby store and bought a box of 'Fighters, Rangers, and Paladins' by TSR. I loved them even though they weren't very nice figures.
I had no idea how to paint, but managed to place the colors approximately where they belonged. To the left is the the first miniature that I ever painted. It serves as a wonderful reminder of how far I've come since then.
|
 It wasn't long before I realized that a miniature should have some sort of shading. I did not know how to go about this so I tried painting thin dark lines into recessed areas. The centaur on the right is an example of this. I only attempted to shade the horse body and the lines are barely noticable.
My realization that miniatures need some sort of shading was a very important development for me. All I needed to do was to find a better method.
It wasn't long before I realized that a miniature should have some sort of shading. I did not know how to go about this so I tried painting thin dark lines into recessed areas. The centaur on the right is an example of this. I only attempted to shade the horse body and the lines are barely noticable.
My realization that miniatures need some sort of shading was a very important development for me. All I needed to do was to find a better method.
|
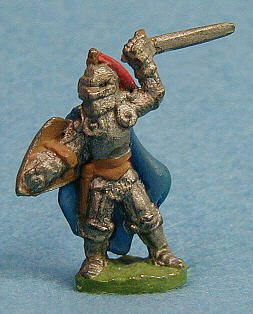
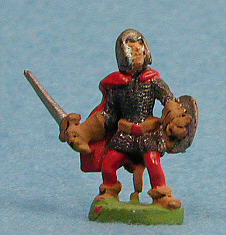
 The knight on the left was painted using a similar style. Instead of simply painting the lines as a thin strip, I first painted the miniature with dark colors. I then painted the lighter color on top. This made the shadows show a little better, but they are still barely noticable.
|
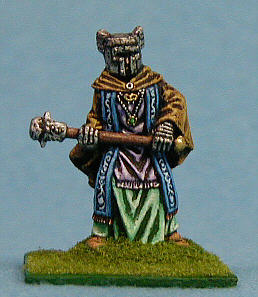
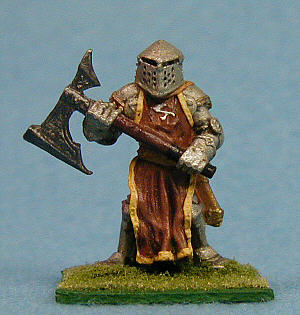
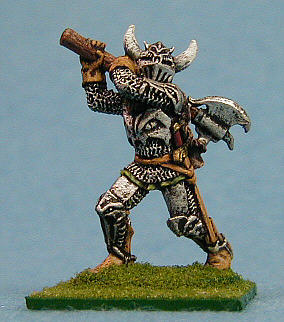 I discovered a small pamphlet about painting miniatures. Inside, a technique called drybrushing was briefly mentioned. I didn't know exactly what this meant, but I figured it had something to do with a dry brush (obviously). I experimented for a while and eventually discovered what it meant to drybrush on a miniature. I
loved it so much that I used it for all of my shading. The priest and warrior to the right display what I was able to accomplish with drybrushing.
I discovered a small pamphlet about painting miniatures. Inside, a technique called drybrushing was briefly mentioned. I didn't know exactly what this meant, but I figured it had something to do with a dry brush (obviously). I experimented for a while and eventually discovered what it meant to drybrush on a miniature. I
loved it so much that I used it for all of my shading. The priest and warrior to the right display what I was able to accomplish with drybrushing.
|
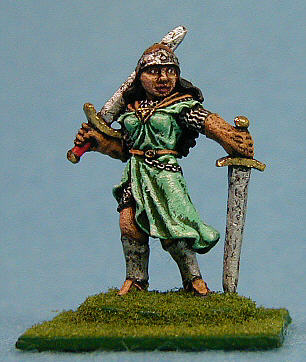 Just like most people I've known, I had a very difficult time painting eyes. I was often happy with everything on a miniature except for its eyes. This was very frustrating, but after years of practice I finally worked out a good technique. The miniature to the left shows what I was able to accomplish.
|
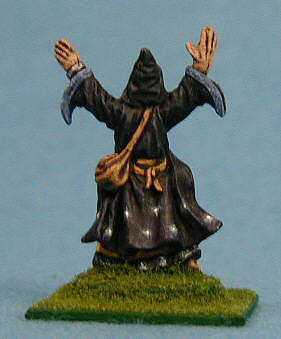 The wizard to the right represents an order of wizards called the Night Watch. According to the background, they wear black cloaks with star insignias. I needed to paint the stars, but I had no idea how to blend them into the black background. I found that a little water mixed with white forced the paint to spread out and blend. This
is the first time I tried this technique. It opened the door to other shading styles.
The wizard to the right represents an order of wizards called the Night Watch. According to the background, they wear black cloaks with star insignias. I needed to paint the stars, but I had no idea how to blend them into the black background. I found that a little water mixed with white forced the paint to spread out and blend. This
is the first time I tried this technique. It opened the door to other shading styles.
|
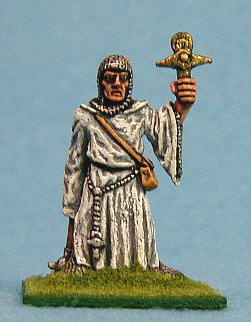 My miniatures to this point had a chalky or dirty look to them because of drybrushing. The effect on skin to annoy me. I knew there had to be a better way. I experimented and discovered the layering technique for shading. I shaded the skin on the cleric to the left by layering flesh tones onto orange. I was extremely happy with the result.
This style began to slowly replace drybrushing until I learned to use each for different reasons.
My miniatures to this point had a chalky or dirty look to them because of drybrushing. The effect on skin to annoy me. I knew there had to be a better way. I experimented and discovered the layering technique for shading. I shaded the skin on the cleric to the left by layering flesh tones onto orange. I was extremely happy with the result.
This style began to slowly replace drybrushing until I learned to use each for different reasons.
|
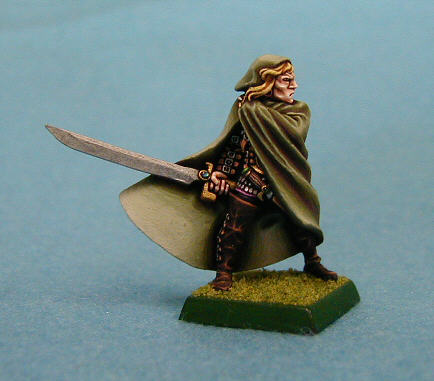
 Now that we've examined the stages from which I learned to paint, it is time to view a comparison. The pictures included here show the first elf that I painted in 1984 and an elf that I painted in the year 1999. Take a close look at the improvements. The newest elf displays a wide array of techniques and is a perfect example of what a person can do with practice.
|

;)
;)
;)
;)
;)
;)
;)
;)
;)
;)